Motorola Moto G kitkat upgradation

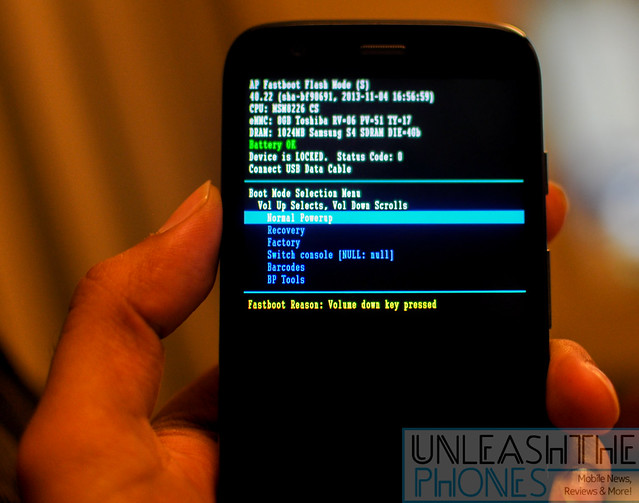
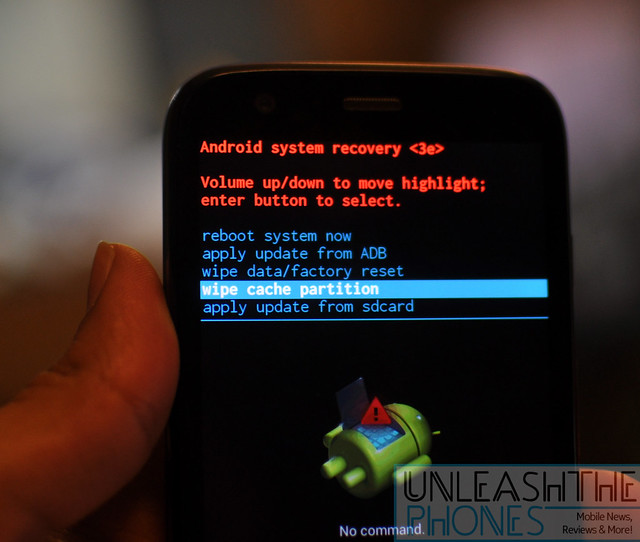
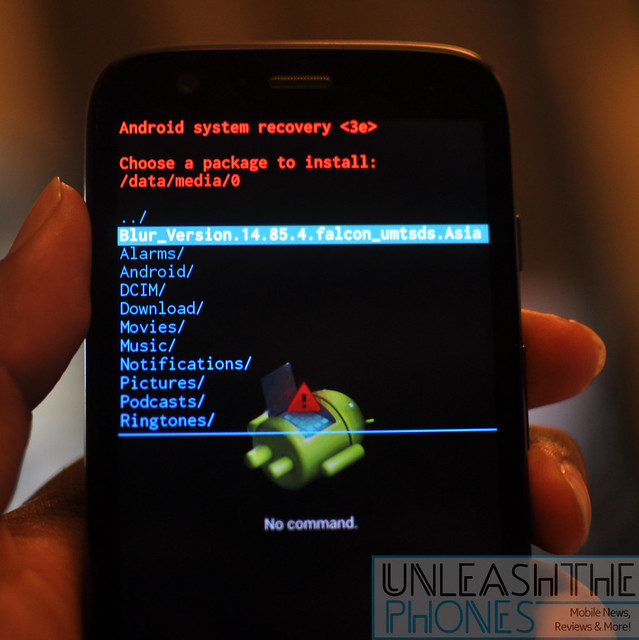
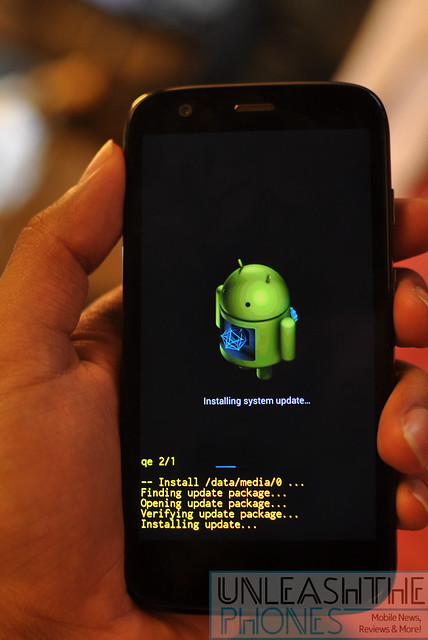
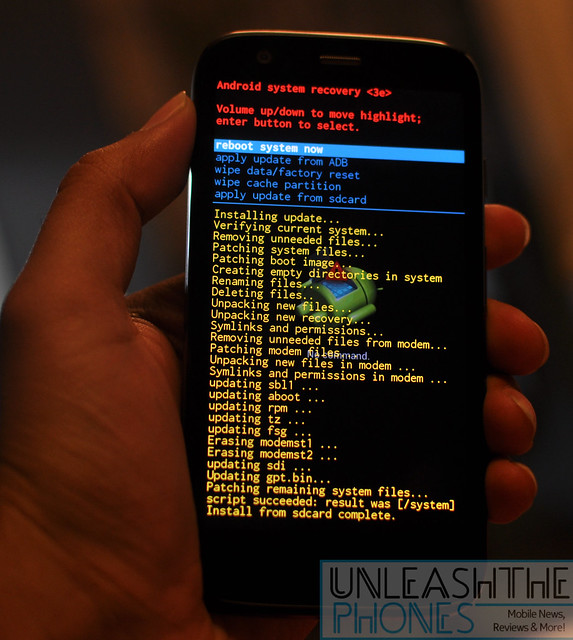
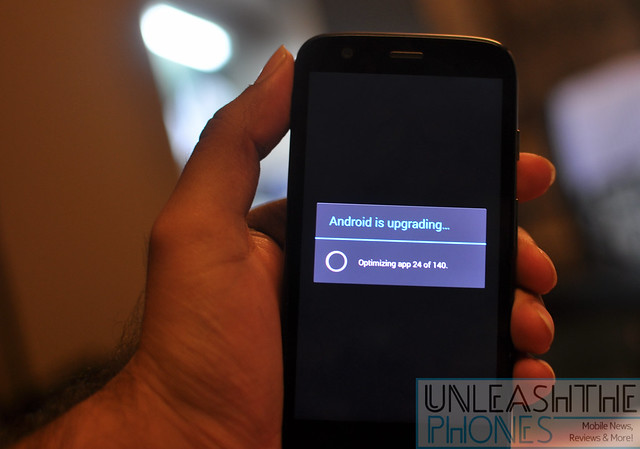
How to Upgrade motorola moto g to kitkat 4.4

By : Amandeep Singh Chawla

Before following this guide, first navigate to 'Settings>About>System Updates' and see if you have any updates available. If you do, go ahead and update that way. If not, feel free to follow the guide below. Note that this is exact same update that we had included in the guide last week, so if you had already updated, you are as up to date as can be]
We have the Indian Dual SIM Moto G with us. While Motorola have launched it in India with Android 4.3 Jelly Bean and said Android 4.4 KitKat will be coming later on (an ‘Assured Upgrade’), if you have just bought a Moto G, now would be a great time for your new phone to have a new OS, right?
We have compiled an Extremely Easy To Follow Guide for you to upgrade your phone to Android 4.4 right now. It requires you to have a Moto G, a computer (Mac or PC), a microUSB cable, an internet connection and the ability to follow simple English instructions. No prior knowledge required whatsoever.
Disclaimer:
  • Follow this guide at your own risk. While we think it is highly unlikely that it will cause any issues to your Moto G, UnleashThePhones takes no responsibility if you brick your phone.
  • This guide has been simplified from XDA user allan163′s thread of the same. If you’ve done this sort of thing before, feel free to jump over there.
  • This guide does not Root your phone.
  • This guide does not Unlock your Bootloader.
  • This guide does not void your Warranty
  • This guide does not Factory Reset your phone or cause any Data Loss.
  • This guide works for (though is not limited to) the Dual SIM Indian Edition of the Moto G (both 8 and 16GB variants). It should also work with all Asian variants of the Moto G though. Both SIM Slots function properly after the update too.
  • The update process takes 10-15 minutes and uses a good amount of battery. My phone went from 93 to 53%. Make sure your battery is charged at least 80% to be on the safe side. You don’t want power dying out halfway through.
  • If you value USB-OTG, you may want to hold back. USB-OTG works out of the box on Android 4.3, but on Android 4.4 you need to either root or donwload a paid app to get the functionality back. This seems to be intentionally done by Google.
Step 1: Get the Update File
Download the Update file from here or here.
Screen Shot 2014-02-09 at 1.27.45 am
The exact name is “Blur_Version.14.85.4.falcon_umtsds.AsiaRetail.en.03.zip”. The file should be 241.9 MB in size on your computer. Make sure the download hasn’t stopped halfway and the file is of a smaller size. If that happens, delete the downloaded file and repeat.
If you know what MD5 Checksums are, the MD5SUM for the file is 44f72f52d72e9e73e3f5c5d6447c2bf5.

Screen Shot 2014-02-09 at 1.28.11 am
Step 2: Transfer Update File to Phone
Your phone didn’t come with a microUSB cable, so you’ll have to use your own cable. Hook up your phone to your Windows of Mac computer. If this is the first Android device you are connecting to your Mac, download and install the Android File Transfer app from here. Drag and drop the file from your downloads folder to your Moto G.
Once done transferring, remove the microUSB cable from the phone.
Important: The update file needs to be in the root file of your phone. ie: It should not be in any of the folders, rather in the main screen as shown below. 
The file size may now be slightly different, but thats okay.
Screen Shot 2014-02-09 at 1.28.34 am
Step 3: Boot into Fastboot Mode
Long press the Power Button and Switch Off the phone. Now that your phone is off, first press and hold the Volume Down button, followed by the Power Button. Hold both these buttons down simultaneously for 3-4 seconds and let go. Your phone should immediately boot into Fastboot Mode as shown below.
Step 1
This is probably the first and last time you will have to deal with such a mode. All you have to know here is the Volume Down button scrolls down and the Volume Up button makes a selection.
Step 4: Enter Recovery
Press Volume Down one time, so the text called ‘Recovery’ is highlighted. Then press theVolume Up key to make the selection. You should now see a screen as shown below.
Step 2
Step 6: Apply Update
Press the Volume Down key 4 times, till you are highlighting the text that says ‘apply update from sdcard’. Then press the Power Button to select it.Step 3
You should now see the 241MB File (Blur_Version….zip) that you downloaded and transferred to your phone. Make sure this file name is highlighted, and press the Power Button. Voila!
Step 7: Sit back with bated breath and watch
Your job is done. Your phone should take 5-10 minutes to install the update. Expect to see the following on your phone screen.
Step 5
Step 8: Reboot Phone
Once it says ‘Install from sdcard complete‘ as it does at the bottom of the picture below, make sure ‘reboot system now‘ is selected and press the Power Button.
Step 6
Your device will now boot into Android 4.4. You can expect to see the below screen while it upgrades your apps from 4.3 to 4.4.Step 7
How to check which version of Android you are on:
Navigate to Settings. Scroll all the way down to ‘About Phone’
Screenshot_2014-02-09-02-27-56
Scroll down and see Android Version. This update should change it from 4.3 to 4.4.2.
Screenshot_2014-02-09-02-28-03
Fun Fact: keep tapping on the 4.4.2 until the below animations pop up.
Screenshot_2014-02-09-01-29-36 Screenshot_2014-02-09-02-28-10
That’s it. Let us know if the guide was easy to understand if you are doing this for the first time. Let us know any queries in the comments below.


You may also like

1 comment:

andrew said...

Nice it help me to upgrade my new phn.thnx

Powered by Blogger.
//go.ad2up.com/afu.php?id=131698